Converting Blender Animations to Clips [2]
This tutorial will explain to you how to convert animations from Blender to clips for The Sims 4.
1. Download Sims4Studio & S4PE
> Blender 3.3 - Download (Requires Sims4Studio Star)
> Blender 2.7 - Download (Requires Sims4Studio Wishes)
> Sims4Studio Star - Download
> Sims4Studio Wishes - Download (old)
> S4PE - Download (at least version 0.5.5)
> Custom Game Rig - Download
2. Import Animations
Once you’re done with your animation, you have to turn the ’.blend’ files into Clip and Clip Header files.
To do that you have to use Sims4Studio. If at any point Sims4Studio requires Blender to be installed and you’ve already installed it, set its location in ‘Settings’ menu.
> 2.1. Place the Custom Game Rig file into the Sims4Studio Mods folder.
If you never turned on Sims4Studio, turn it on once, let it load, and turn it off.
Go to the "C:\Users\name\Documents\Sims 4 Studio\Mods" folder and place the TURBODRIVER_WickedWhims_Override_Sim_Rig.package file in there. This will assure the custom rig is used.
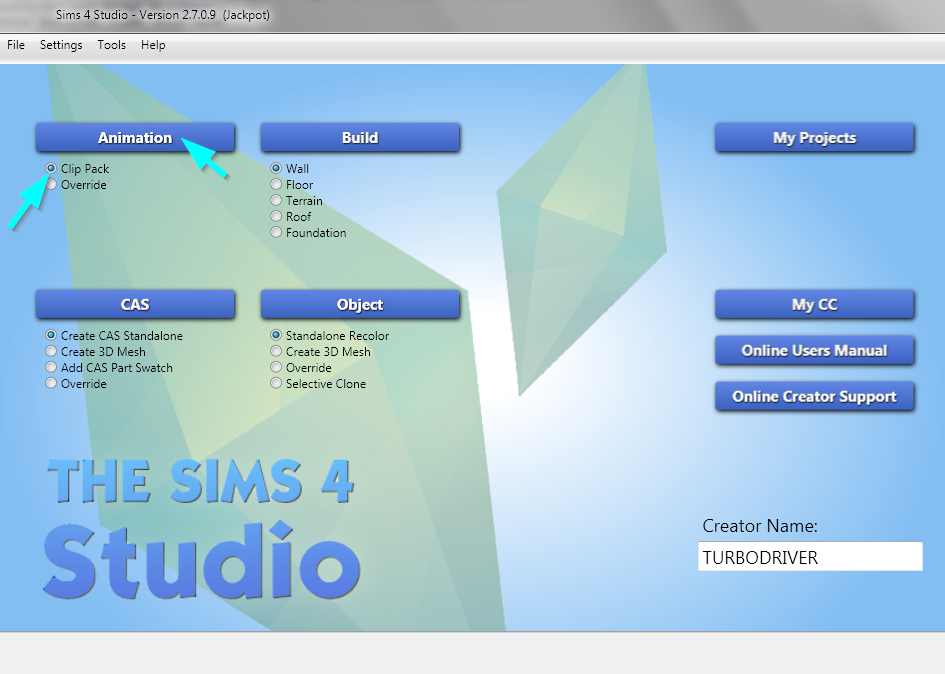
> 2.2. When Sims4Studio loads, select 'Clip Pack’ option and click the 'Animation’ button.
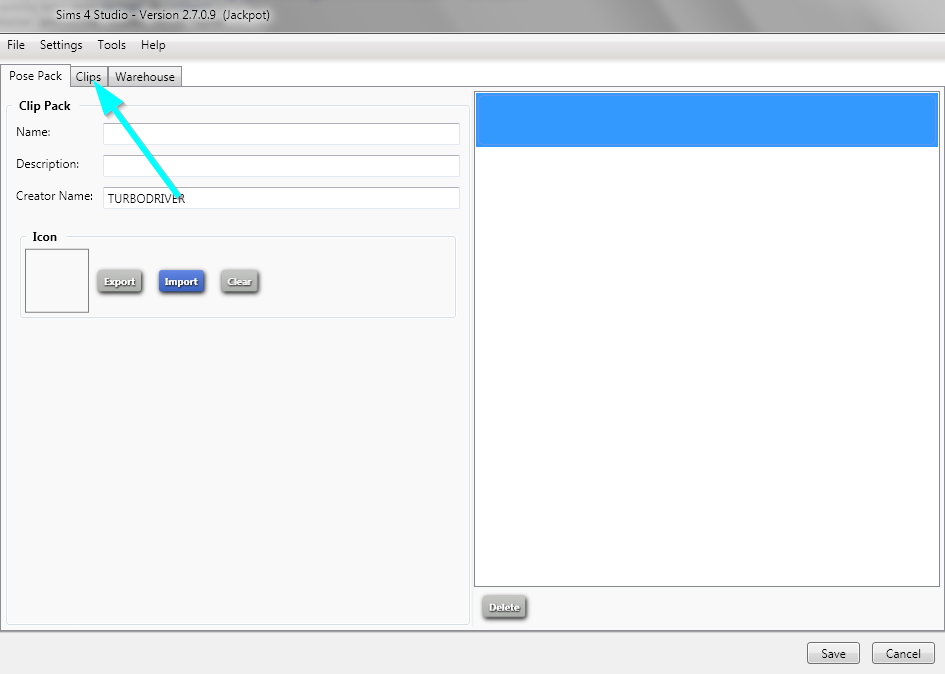
> 2.3. Choose a place to save your package. We will be opening it later.
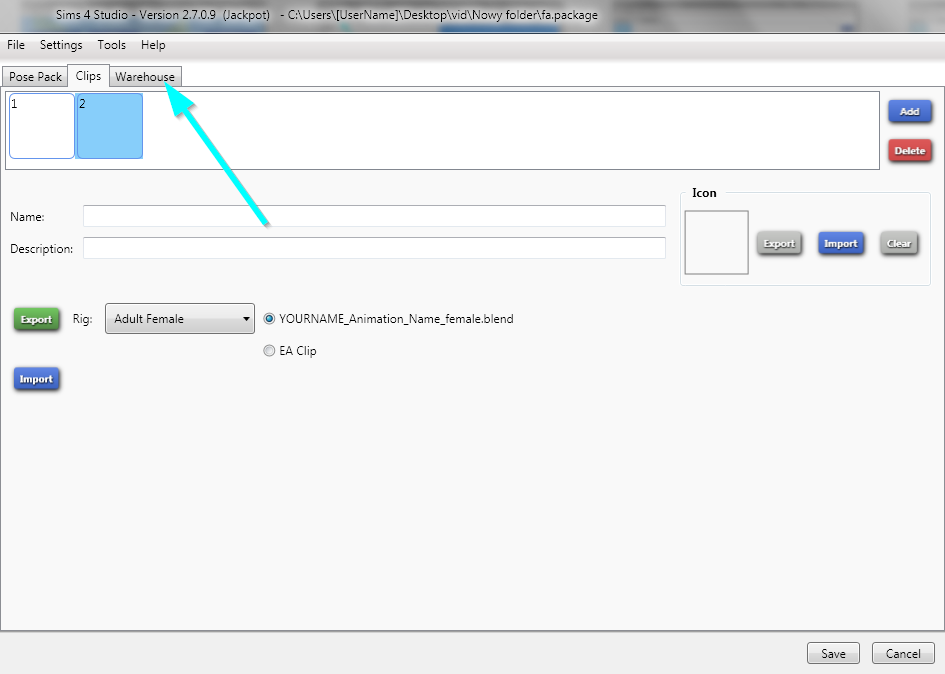
> 2.4. Right away switch to the 'Clips’ tab.
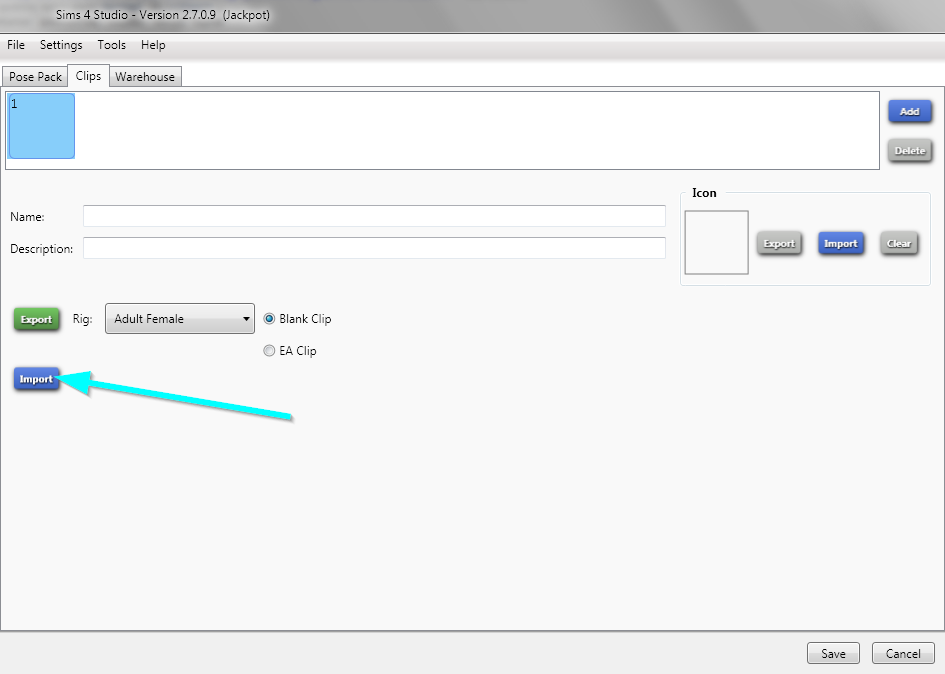
> 2.5. Click the 'Import’ button and select a blender file (.blend) with the animation you want to load.
> 2.6. To convert multiple animations, click the 'Add’ button, select the newly added field and import another blender file.
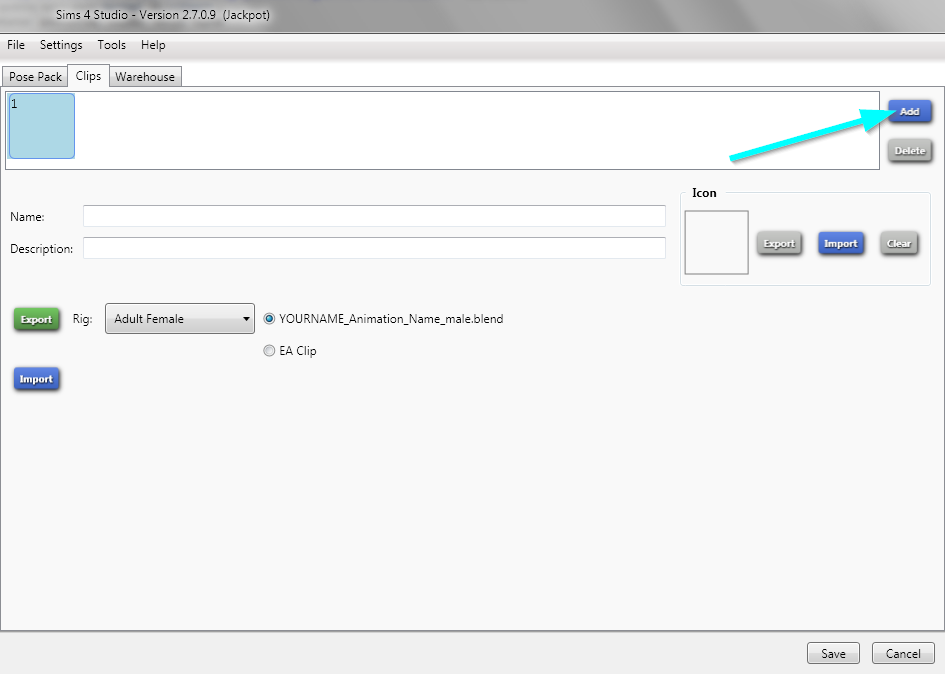
> 2.7. Once you’re done importing your animations, switch to the 'Warehouse’ tab.
In my example, I have two animations - one for a male and one for a female.
3. Verify and set animation duration
> 3.1. Select imported Clip on the list to see its data. Focus on TickLength, TickCount and Duration.
In older versions of Sims4Studio these are called FrameDuration, MaxFrameCount and Duration.
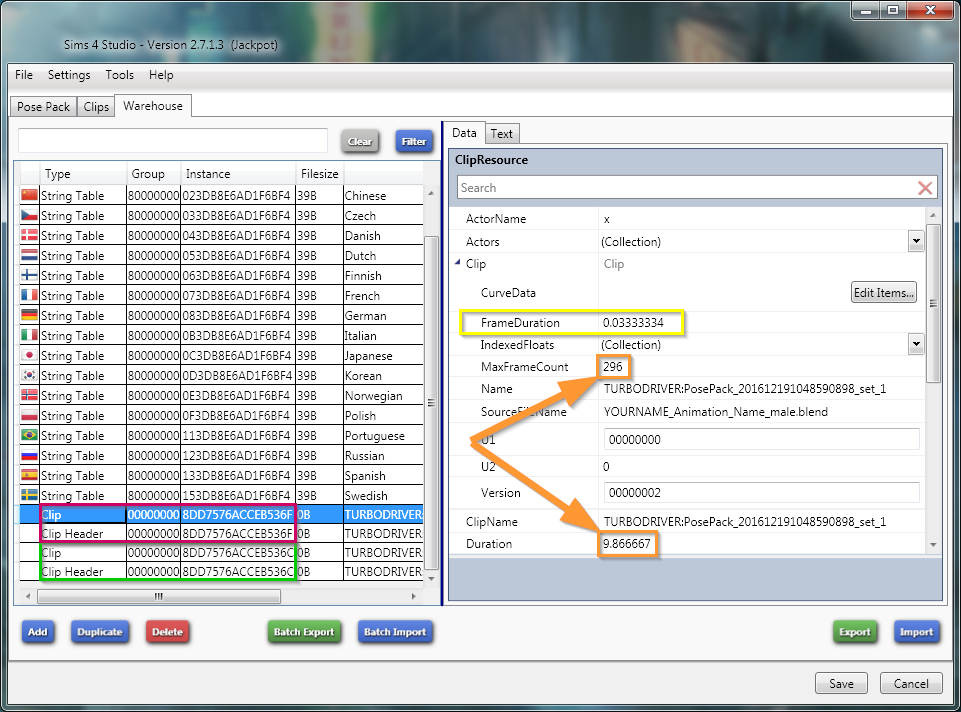
In some situations, your animation might not loop seamlessly. In that case, you may want to adjust the TickLength and the TickCount with the Duration value.
> 3.2. TickCount field of your Clip has to be the same amount as a number of frames in your Blender animation. If it’s not, set it as such.
The number of frames of your animation in Blender is in the value labeled as 'End’ at the bottom of the timeline.
> 3.3. TickLength field has to be set as '0.03333334’, which represents the duration of a single frame of your animation.
You use this value to set your animation duration by multiplying TickLength with TickCount.
> 3.4. Duration field is your animation duration which is based on your TickCount multiplied by TickLength.
For example, if your animation has 100 frames, you multiply it by 0.03333334 to get 3.333334 which would be your animation duration.
TickCount and TickLength variables always have to work together to create the Duration variable.
> 3.5. Every Clip is paired with a Clip Header which has to represent the same exact information as paired with it Clip.
You can see pairs of Clip and Clip Header by the same 'Instance’ value on the list. Make sure Clip and Clip Header have the same values entered for TickLength, TickCount, Duration, and ClipName.
You can consider editing these values in S4PE instead which would automatically update the Clip Header file for you.
> 3.6. Once all Clips and Clip Headers are checked and ready, you can save and close Sims4Studio.
4. Extract Clip and Clip Header files
> 4.1. Open created with Sims4Studio package using S4PE. From 'File’ choose 'Open…’ and pick your package.

> 4.2. Select all the CLIP (Clip) files and CLHD (Clip Header) files and export them for later use.
Now you have exported your animation files that are ready to be used directly by the game.
5. Create WickedWhims Animations Package
For this, you have to check out the 'Creating WickedWhims Animations Package’ tutorial.
Last update: July 24th, 2023