Creating Custom Skin Tone for WickedWhims
This tutorial will explain to you basics of creating custom skin tones that are supported by WickedWhims. Note that this tutorial will not tell you how to make good skin tones, but just working skin tones.
1. Download Resources
> TS4 Skininator - Download
> Skin Tone Templates - Download
> Aorta DDS - Download
Aorta will be used to convert PNG files into DDS files that can be used in TS4 Skininator. If you can’t use Aorta or don’t want to, you can use Sims4Studio to load a PNG file and save it as a DDS file.
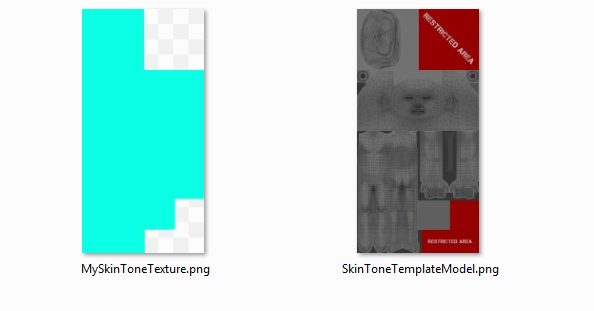
Skin Tone Templates archive file contains two files, but only the ‘MySkinToneTexture.png’ file will be used in this tutorial. The ‘SkinToneTemplateModel.png‘ file is used to inform you how the skin tone texture area is mapped and show you where the extra WickedWhims penis texture space is located (green square).
2. Recolor Texture
Open the ‘MySkinToneTexture.png’ file with your preferable graphics editor (like Photoshop or GIMP), change the color to the skin tone you want, and save the file.
It’s important to use this template if you want your skin tone to be compatible with WickedWhims because it contains an additional region with color used by penis mods.
That additional region is located on the bottom-right of the texture and it is marked with a green square on the ‘SkinToneTemplateModel.png‘ file. It’s important to keep that additional region as one solid color to properly display all penis models texture.
3. Convert Texture to DDS
To use your edited ‘MySkinToneTexture.png’ file you need to convert it to a DDS file. In this tutorial, we will be using Aorta, but if you know how to do it with Sims4Studio, you can use it instead.
Open Aorta and click the Load normal… button. Then select the ‘MySkinToneTexture.png’ file and open it.

Once you see your texture loaded, click the Save as… button and save the file as ‘MySkinToneTexture.dds’ file.
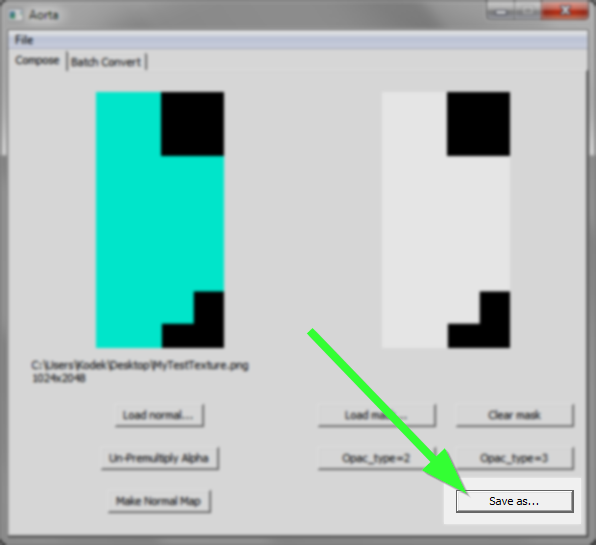
On the DDS Options screen, you need to make sure to at least have the ‘Use DXTC’ option selected, and then click the OK button to save.

4. Creating the New Skin Tone Package
Creating a new skin tone package is all done with TS4 Skininator, so turn that on. On the first run, you will be asked to give your creator name, path to the game files and path to the Sims 4 documents folder.
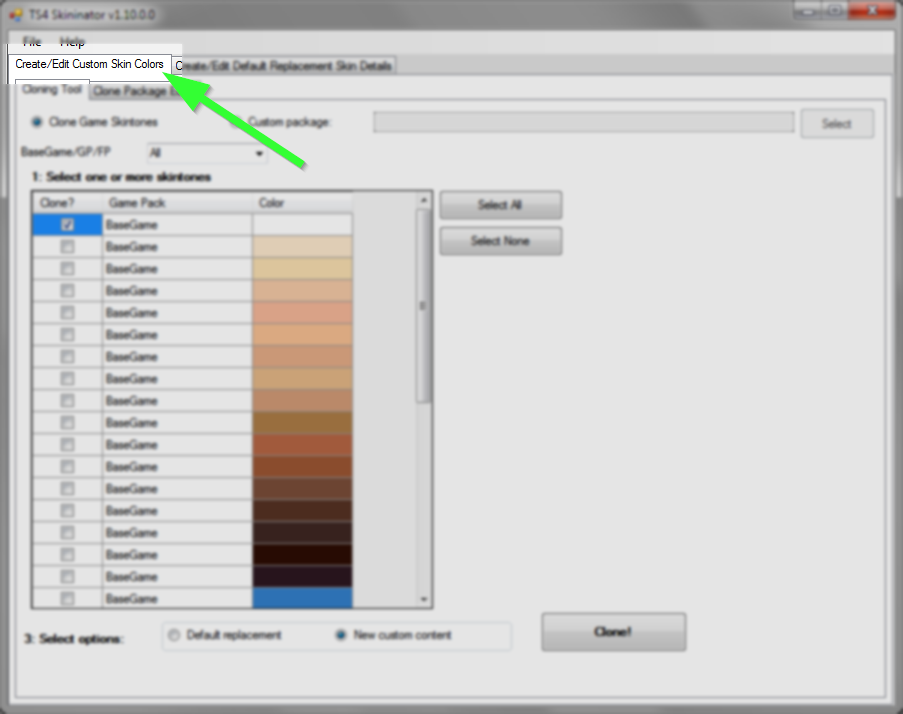
Once you see the main application window, let’s start with making sure that you have the Create/Edit Custom Skin Colors tab selected.
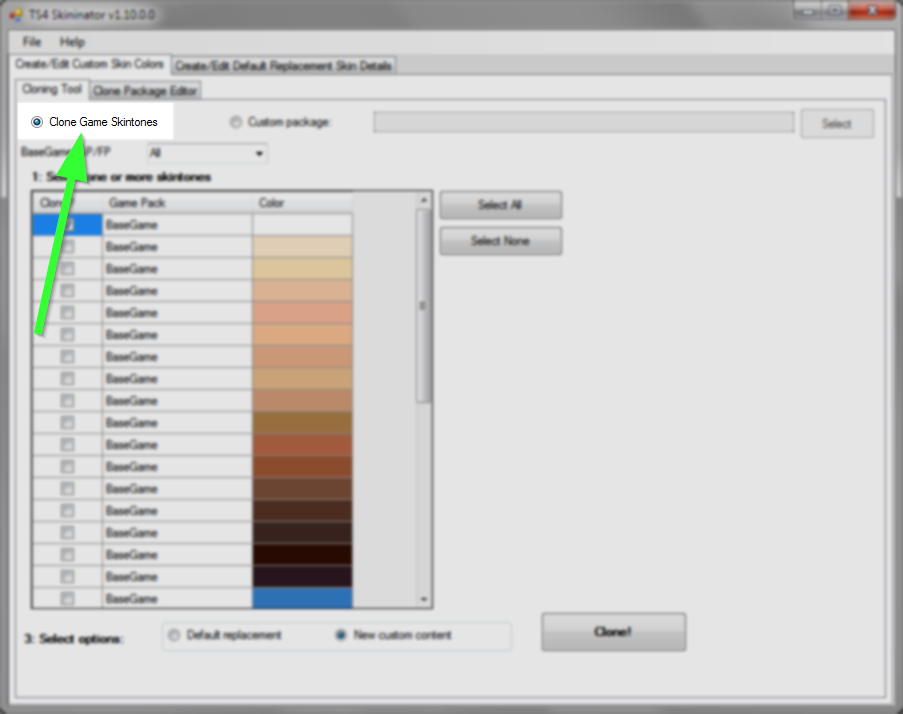
Then make sure you have the Cloning Tool tab selected.

On that tab, select the Clone Game Skintones option which should display you the list of all the skin tones you have in your game.
Then select the checkmark on the first skin on the list, because we will only be making one new skin tone for a human (not vampire or alien) in this tutorial.
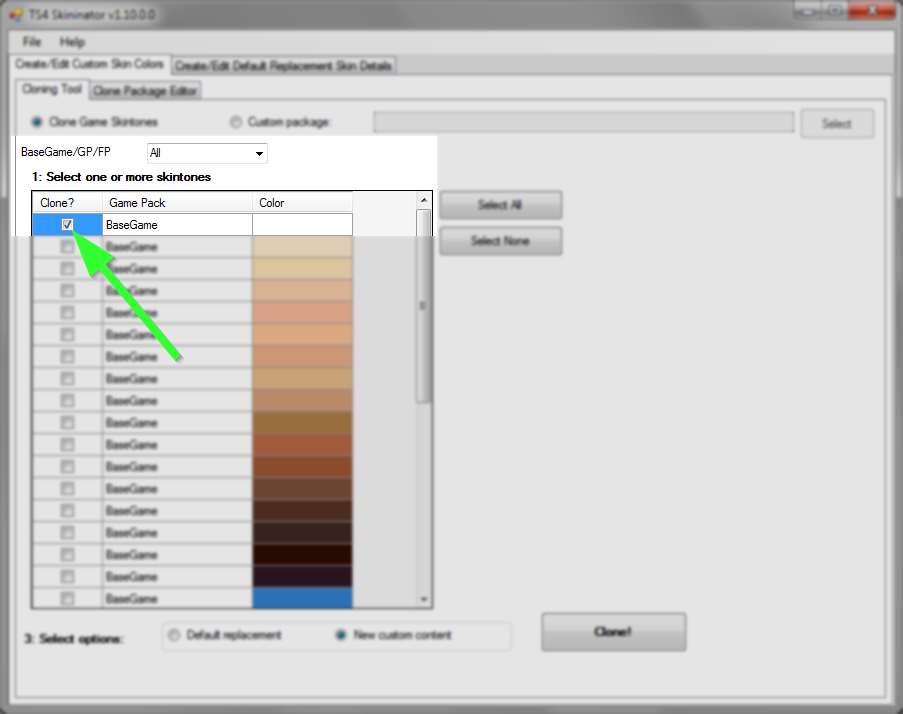
And before we’re done, make sure you have the New custom content option selected at the bottom.
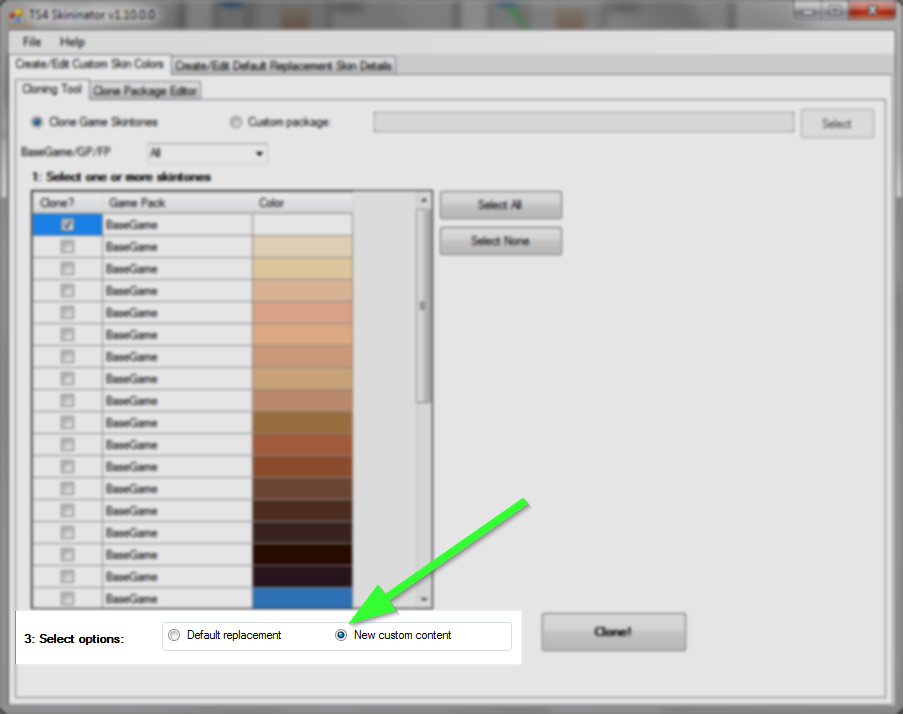
That’s it! Now click the Clone! button and save your package. That package will be later used to apply your new skin tone texture and that will be your package that you will use in your game once we’re done.
5. Editing the New Skin Tone Package
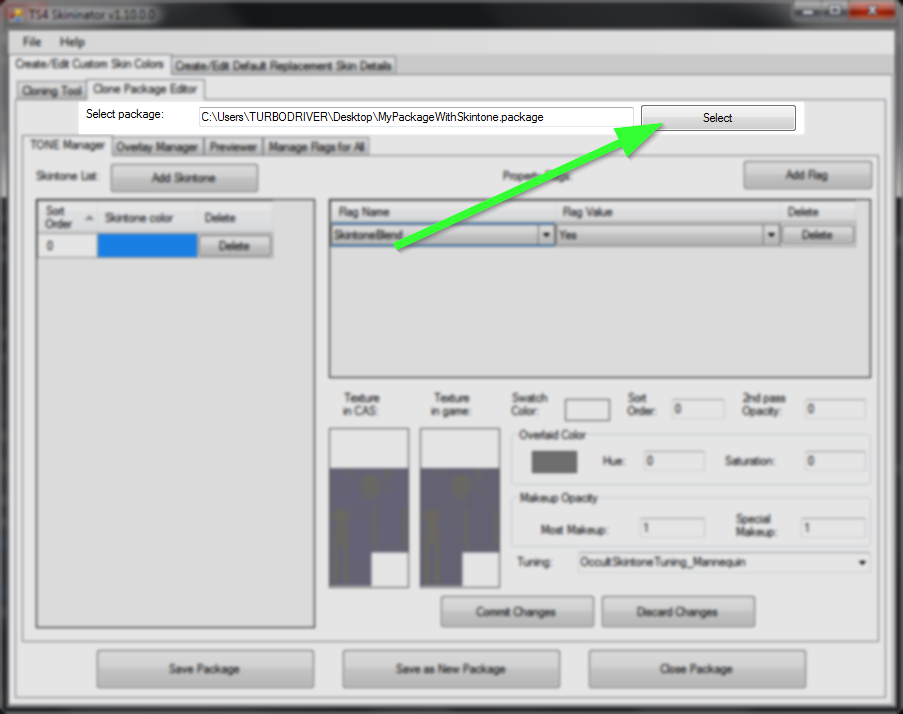
Let us switch to the Clone Package Editor tab for this part.

There click the Select button and select your newly created package.
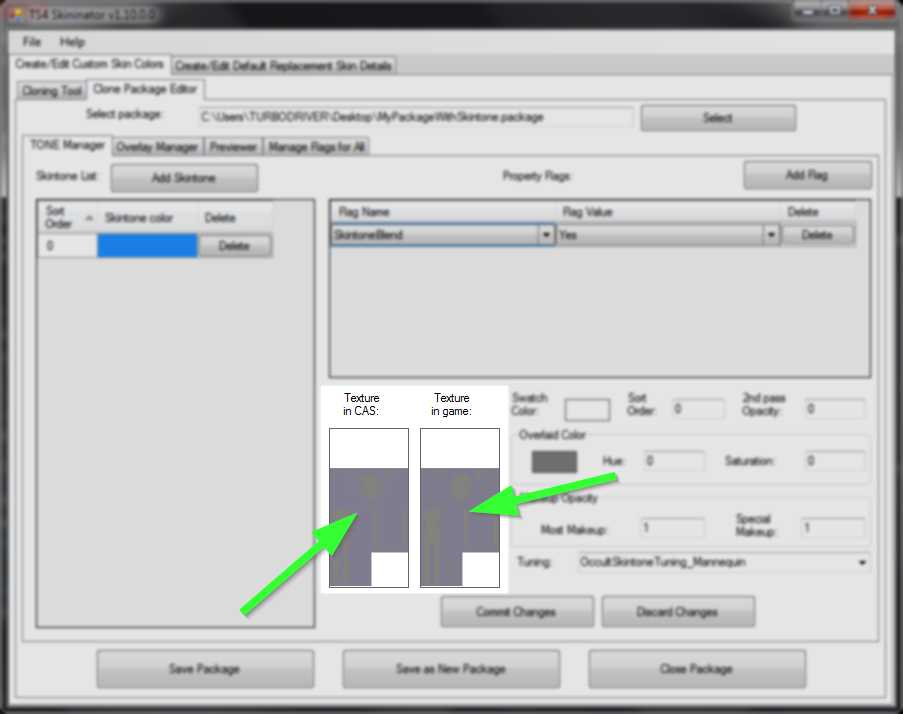
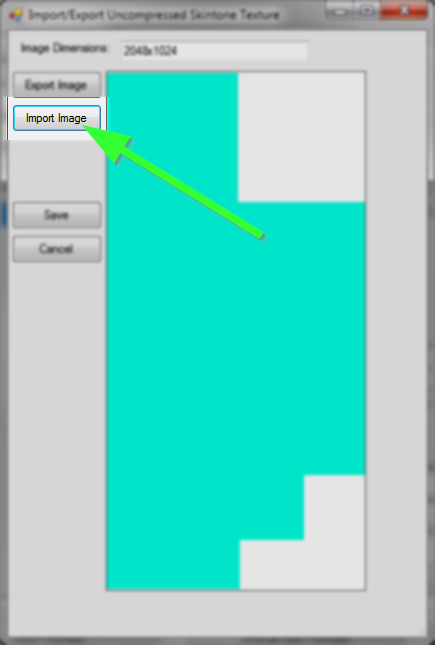
Once it loads, we can replace the textures with your new skin tone. Click on the gray area to open a new window for replacing the texture. You need to do this twice for both the ‘Texture in CAS’ and ‘Texture in game’ fields.
In the newly opened window click on the Import Image button and then select your ‘MySkinToneTexture.dds’ file.
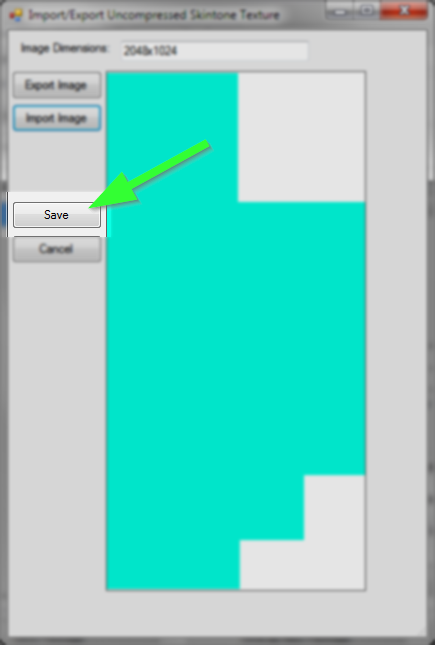
And then just click the Save button.
Remember to repeat this process for both the ‘Texture in CAS’ and ‘Texture in game’ fields.
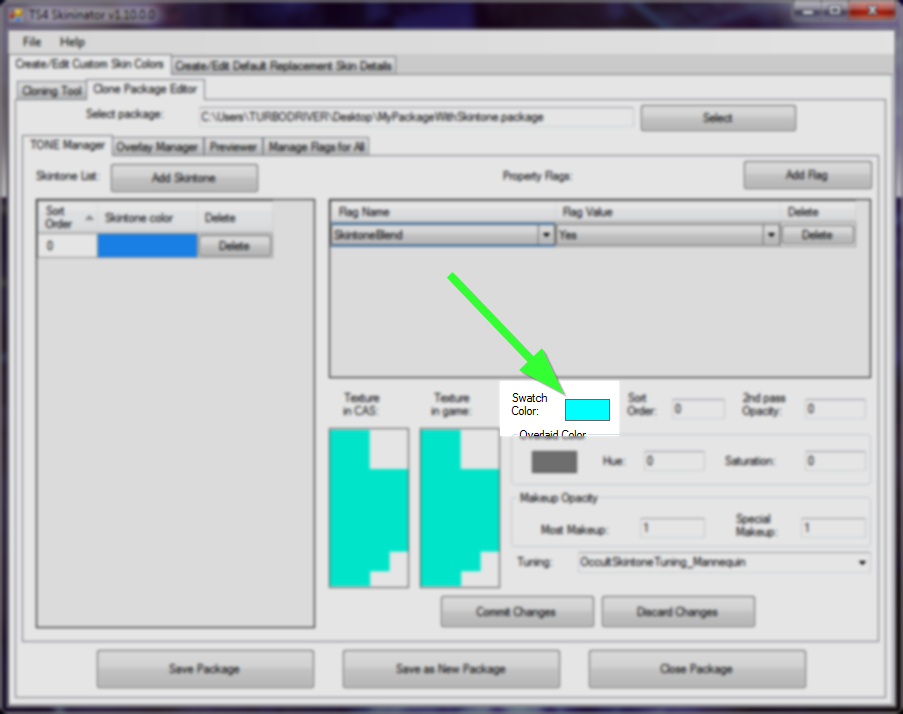
The last thing to change is the Swatch Color that will be visible in CAS. Just click on the white rectangle and pick the new color.
Then click the Commit Changes button to apply all the things you’ve done.
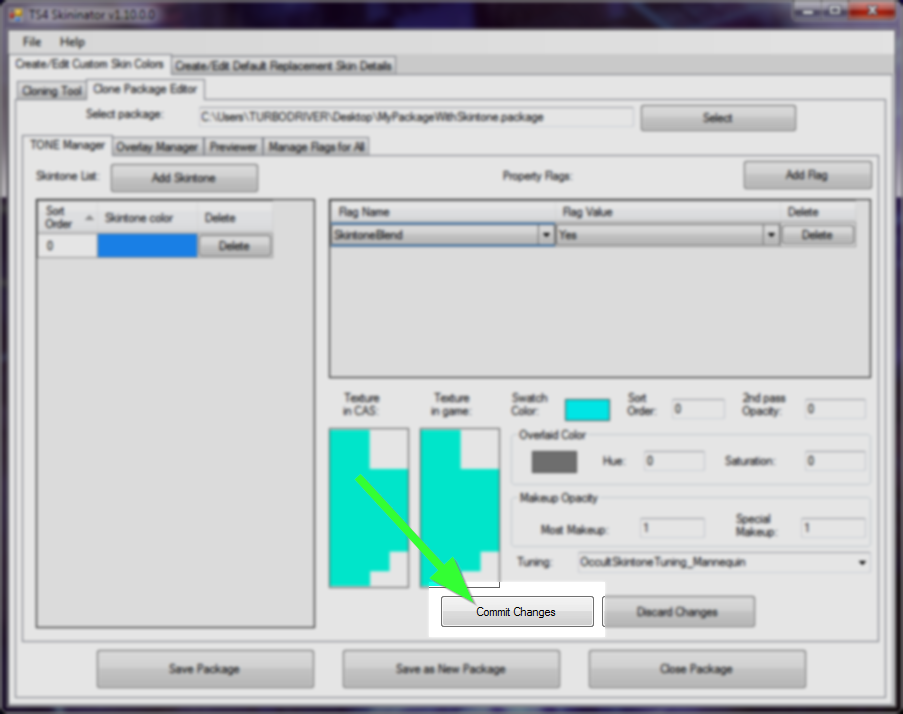
And click the Save Package button to be finally done.
6. Finish
That’s it. You’re done. You can now close the TS4 Skininator application and test your package in-game by moving it into your Mods folder.
Note that you can make skin tone textures with more detail if you want, and apply special flags, but the most important part is to keep the extra skin space explained at the beginning.
Last update: 21st of April 2020